Before You Start
Correct ball valve installation begins before the valve touches the pipe. Confirm the ball valve matches the specification — size, pressure-temperature rating, material, and end type — and inspect it for shipping damage. Critically, install the ball valve in the fully open position so the seats are shielded from thread sealant, weld spatter, and pipe debris during the work.
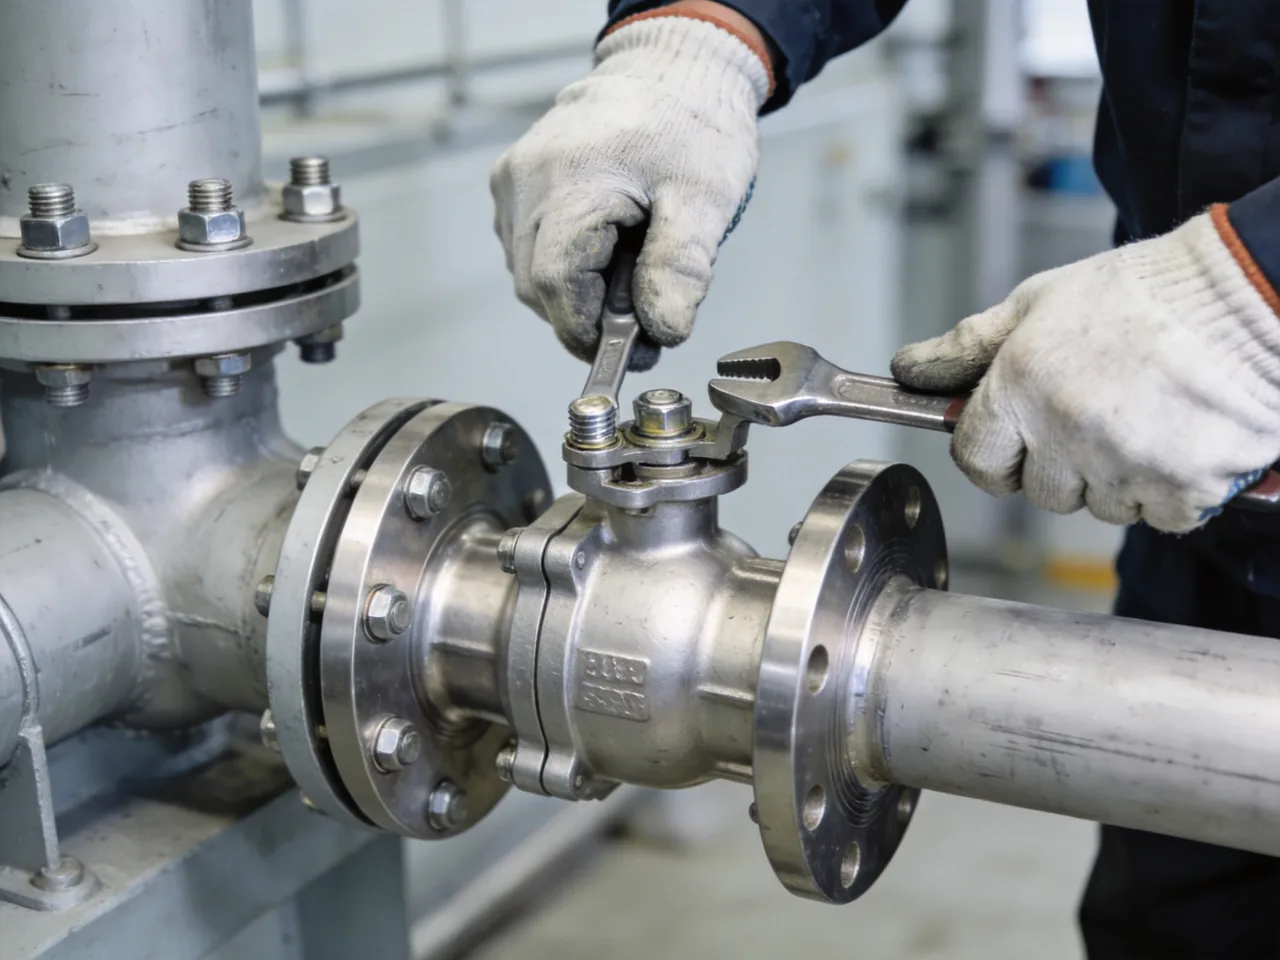
Clean the pipe ends thoroughly and flush the line of scale, chips, and debris. Particles trapped between the ball and seat are a leading cause of seat scoring and leakage on a newly installed ball valve. Leave enough clearance around the valve for the handle or actuator to swing a full quarter turn and for future maintenance access.
Gather the right tools and materials before starting so the job is not interrupted mid-installation. For a threaded valve that means PTFE tape or pipe-thread sealant and correctly sized wrenches; for a flanged valve, new gaskets, the specified bolts and nuts, and a calibrated torque wrench; for welded ends, the appropriate welding equipment and heat-management tools. Confirm the valve rating and material one final time against the line specification, and verify the system is depressurized, drained, and isolated before breaking into the pipe. A few minutes of preparation prevents the most common installation problems.
Orientation and Flow Direction
A standard two-way floating ball valve is bidirectional, so it can be installed with flow in either direction and mounted at almost any angle around the pipe axis. The main orientation rule for a standard ball valve is practical: position the stem and handle where they can be reached and operated.
Some ball valves are directional and must be installed correctly. Three-way (L-port and T-port), many trunnion-mounted, and metal-seated designs can be unidirectional and carry a flow-direction arrow on the body. When a flow arrow is present, install the ball valve so the arrow points downstream, in the direction of flow.
Mounting angle is usually flexible but worth a moment's thought. A ball valve can be installed horizontally or vertically, but place the stem so the handle clears nearby pipes, walls, and insulation through its full quarter-turn swing, and so an operator can reach it safely. For actuated valves, orient the actuator for accessible wiring or tubing and adequate cooling. Avoid mounting the stem pointing straight down where debris or condensate can collect in the stem area over time.
Always check the body: Before installing any ball valve, look for a cast or stamped flow-direction arrow. If there is an arrow, the valve is directional and the arrow must point in the flow direction; if there is none, a standard two-way ball valve can go in either way.
Threaded Ball Valve Installation
Threaded ends suit small-bore water, air, and oil lines. Seal the threads correctly and avoid over-tightening, which can crack the body or distort the seats.
- Confirm the ball valve is open and the pipe threads are clean and undamaged.
- Apply PTFE thread tape (two to three wraps in the thread direction) or pipe-thread sealant to the male pipe threads only — never to the valve's internal parts.
- Thread the valve on by hand until snug, keeping it square to the pipe.
- Tighten with a wrench one to two turns past hand-tight; apply the wrench to the valve end nearest the joint, not across the body.
- Stop at the proper tightness — do not force extra turns to align the handle.
Flanged Ball Valve Installation
Flanged ends suit larger industrial pipelines and allow the valve to be removed for service. Even gasket compression and a correct bolt-tightening pattern are essential for a leak-free flanged ball valve joint.
- Confirm the ball valve is open; align the valve flanges with the mating pipe flanges.
- Insert a new gasket rated for the media and temperature between each flange pair.
- Fit all bolts hand-tight, then tighten in a star (criss-cross) pattern in stages.
- Torque the bolts evenly to the specified value so gasket load is uniform around the flange.
- Support the piping so the valve body carries no pipe weight or bending load.
Commissioning the Valve
After the joint is complete, flush the line with the ball valve open to carry away any remaining installation debris before the valve is first closed. Then cycle the ball valve fully open and fully closed a few times to confirm smooth quarter-turn operation and correct handle indication.
Pressure-test the joint and check for leaks at the seats (across a closed valve), at the stem, and at the threaded or flanged connection. Only after a clean leak test confirms the joint, seats, and stem are tight should the ball valve be put into service. Record the installation date and valve details so the valve enters the preventive maintenance schedule from day one.
If the ball valve is actuated, commission the actuator as well: confirm the open and closed limit settings match the valve's true end positions, verify the fail-safe action (fail-open or fail-closed) is correct for the process, and check that the position feedback or indicator agrees with the actual ball position. An actuator set to the wrong limits can leave the valve slightly open when it reads closed, defeating the isolation the valve was installed to provide.
Common Installation Mistakes to Avoid
Mechanical Mistakes
- Installing the valve closed, exposing seats to debris
- Over-tightening threaded ends and cracking the body
- Uneven flange bolting, causing gasket leaks
- Letting the valve carry pipe weight or stress
Specification Mistakes
- Ignoring a flow-direction arrow on a directional valve
- No handle clearance for the quarter-turn swing
- Sealant applied to internal parts, not just threads
- Skipping the line flush before first closing
Threaded vs Flanged vs Welded: Method at a Glance
The end connection determines the installation method and the tools required. This table summarizes the three common ball valve end types and their installation considerations.
| End Type | Best For | Installation Note |
|---|---|---|
| Threaded (NPT/BSP) | Small-bore water, air, oil lines | Seal male threads only; wrench 1-2 turns past hand-tight; do not over-tighten. |
| Flanged (RF/FF) | Larger industrial pipelines, removable | New gasket per joint; star-pattern bolt torque in stages for even gasket load. |
| Butt-weld | High-pressure, permanent leak-free joints | Keep the valve open and protect seats from heat; use a heat sink and control interpass temperature. |
| Socket-weld | Small-bore high-pressure | Leave the specified root gap; valve open; avoid overheating the body and seats. |
Table notes: Figures are indicative engineering guidance; confirm against the governing standard and your specific service conditions.
Post-Installation Maintenance Basics
Correct installation sets up the ball valve for a long service life, but a few maintenance habits keep it leak-free. Exercise the ball valve periodically — cycle it fully open and closed — even if it normally stays in one position. A valve left in one position for long periods can stick or accumulate deposits on the exposed ball surface, which then scores the seats on the next operation.
Inspect the stem area for signs of weeping; minor stem leakage can often be corrected by adjusting the stem packing gland rather than replacing the valve. Check threaded and flanged joints for leaks during the first pressure cycles after installation, as gaskets and thread seals can settle. For three-piece ball valves, the center body can be removed to renew seats and seals without taking the end connections out of the line, which is why three-piece designs are favored where regular maintenance is expected.
Keep a record of each installed ball valve — size, rating, material, and install date — so it enters the preventive maintenance schedule. Documented, scheduled exercising and inspection is far cheaper than an unplanned shutdown caused by a seized or leaking isolation valve.
Two service conditions deserve extra attention after installation. In systems that thermally cycle, trapped fluid in the body cavity of a closed valve can expand and over-pressurize the cavity; if the valve is not a self-relieving or vented design, plan to crack it open periodically or specify a cavity-relief valve. In cold or outdoor service, drain or insulate the valve so residual liquid cannot freeze in the body and crack it. Matching the maintenance routine to the actual service conditions is the final step that turns a correctly installed ball valve into a reliable, long-lived one.
Finally, never use the ball valve handle as a step or lever for unrelated work, and do not extend the handle with a pipe to force a stiff valve closed. A valve that has become hard to operate signals a seat or stem problem that should be inspected, not overpowered — forcing it is how stems shear and seats are permanently scored.
Related Resources and Product Pages
Frequently Asked Questions
Is there a correct way to install a ball valve?
Yes. Install a ball valve with the stem accessible for operation, leave clearance for the handle to swing a quarter turn, and install it in the open position to protect the seats while sealing the joint. Clean the pipe ends, apply the correct sealant or gasket, and tighten to the proper torque. For most ball valves orientation around the pipe axis is flexible, but handle access and flow direction still matter.
Does it matter which way a ball valve is installed?
For a standard two-way floating ball valve, flow can pass in either direction, so directional orientation is not critical. However, trunnion, three-way, and metal-seated or check-style ball valves can be unidirectional and are marked with a flow arrow that must point downstream. Always check the body for a flow-direction arrow before installing.
Are quarter-turn ball valves directional?
Most standard two-way ball valves are bidirectional and seal in both directions, so they are not directional. Exceptions include three-way (L-port and T-port) ball valves, some trunnion designs, and any valve marked with a flow arrow. When an arrow is present, install the valve so the arrow points in the direction of flow.
Should a ball valve be installed open or closed?
Install a ball valve in the fully open position. With the ball open, the seats are protected from thread sealant, weld spatter, and pipe debris during installation, and the bore can be flushed clean before the valve is first closed. Only close the valve after the joint is complete and the line has been cleared of installation debris.
How do you seal a threaded ball valve?
Seal a threaded ball valve by applying PTFE thread tape or pipe-thread sealant to the male pipe threads only, not the valve's internal parts. Wrap tape in the direction of the threads, two to three turns, then hand-tighten and wrench-tighten one to two turns past hand-tight. Avoid over-tightening, which can crack the body or distort the seats.